My version of Retail Therapy
26 May 2012
May has been one hell of a month on the work front - some of it has been fun, some of it has been frustrating, some of it has been just been downright grim!
So what's a girl to do! Well of course, go shopping!
But I did not hot foot it down to the local high street, no siree. My version of retail therapy was to head off to this wonderful website and order three screens from images I had been working on.
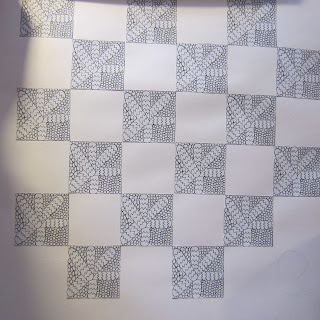
Here they are in black and white.
More of these image will follow.
So what's a girl to do! Well of course, go shopping!
But I did not hot foot it down to the local high street, no siree. My version of retail therapy was to head off to this wonderful website and order three screens from images I had been working on.
Here they are in black and white.
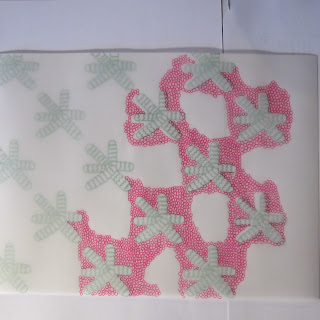
And here are the first outings of the finished screens.
 |
| Add caption |
 |
| I really like this twiggy image, I feel it has real potential. Probably not for the C&G piece, but possibly for an embroidery later. |
5 Colour Printing - a little celebration
24 May 2012
Because it worked!
I made 5 separate print blocks using craft foam. First of all I created a colour design on paper- you might recognize the final print image from the the post on repeat patterns. In that post where I shared an image of 9 quick sketches. I based this print image on the little sketch on the top right hand corner of the grid.
It took a bit of concentration to cut and paste the various pieces of the jigsaw puzzle onto the various bits of card.
And then I printed! With much trepidation, block at a time, I carefully placed the blocks, and it worked!! After each different block I got more excited as the pattern emerged. (for this I used a liquid acrylic paint).
I am feeling rather chuffed with this!
Freezer paper stencils
20 May 2012
I have hardly managed to do anything this week - a very frustrating week exacerbated by a complete need for sleep and lack of energy.
But I dragged myself off the sofa this evening and quickly cut a few stencils with freezer paper, which I then gently ironed onto that piece of 'wet on wet' painted fabric I produced a couple of weeks ago, and which demanded a bit of additional pattern. This paticular piece was just too wet - so all the paint just merged. I had used Dy Na Flow, a really good quality paint and it does look as though the fabric has been dyed.

So a bit fired up, I decided to use a piece of transfer dye paper that I had already prepared (I had sheets of paper with dried dye painted onto them, which I cut into squares and then restuck to a sheet of A4 photocopy paper - I could have just painted squares, but I did it 'the hard way').
I cut more freezer paper shapes, stuck them to a bit of rather nasty buff coloured synthetic fabric. And then applied a hot iron (using sheets of teflon to protect the fabric and the iron) for a long time! I don't really like this technique - my iron does not get hot enough I think, and the effects are a bit blotchy.
So here the shapes have not been removed.
But I dragged myself off the sofa this evening and quickly cut a few stencils with freezer paper, which I then gently ironed onto that piece of 'wet on wet' painted fabric I produced a couple of weeks ago, and which demanded a bit of additional pattern. This paticular piece was just too wet - so all the paint just merged. I had used Dy Na Flow, a really good quality paint and it does look as though the fabric has been dyed.
Having ironed the shapes on to the fabric I felt it needed a bit of extra interest and found a bit of packaging with neat rectangles already cut out.
Frankly I was not up to anything too exhausting so i just grabbed a sponge and some fabric printing ink, a green I had already mixed up.
And I don't know about you, but I think the effect is actually quite successful.

So a bit fired up, I decided to use a piece of transfer dye paper that I had already prepared (I had sheets of paper with dried dye painted onto them, which I cut into squares and then restuck to a sheet of A4 photocopy paper - I could have just painted squares, but I did it 'the hard way').
I cut more freezer paper shapes, stuck them to a bit of rather nasty buff coloured synthetic fabric. And then applied a hot iron (using sheets of teflon to protect the fabric and the iron) for a long time! I don't really like this technique - my iron does not get hot enough I think, and the effects are a bit blotchy.
So here the shapes have not been removed.
And here I have removed the paper shapes. You can see the rather eratic blotchy effect from the iron (including the shapes on the plate, even though there was no water and the steam was off).
I think this technique could be more effective with a heating tool which gives a hotter temperature.
Magic Dyeing Made Easy
15 May 2012
I have had a certain book sitting on my bookshelf for a while, and I just cannot explain why I have not really used it before. Because, now that I have, or a tiny part of it at least courtesy Jane at the C&G course, I realise it is a treasure. If you dye your own fabric, I just don't see how you can do with out this little gem of a book.
It's not one of those coffee table books. There are no arty photos. The best way to describe it is to say it's like one of those old fashioned recipe books - full of practical info in black and white (with a few photos thrown in).
I cannot explain why I haven't really used it, particularly as I do dye my own fabric. But I guess I have tended to just go for a bit of random experimentation.
So last night we applied a bit of Helen's science. Basically, we turned to the colour recipes on page 88 and set up a production line! We were dying with plastic bags - in essence what this involves is putting damp ready to dye fabric into freezer bags together with the dye mixes, salt solution, soda crystal solution and plain water (to the recipes in the book), and then tying the bags and leaving the dye to work it's magic on the fabric for 24 hours.
I took home numbers 10, 15 and 16.
Here they are cluttering up the kitchen work surface.
And here are those fabrics rinsed and hanging to dry. (not a brilliant photo if I am honest, but you can just about make out the different tones in the top two fabrics which are next to each other in the recipe list).
Next week we will be bringing all the fabric in and it will be interesting to compare and contrast!
Experimenting with pattern
11 May 2012
I will never look at wall paper in the same way again!
And I really now appreciate how hard those Victorian pattern specialists must have worked, because I have been cheating a bit (with a modern hewlett packard printer!!)
I have been using the 'tiles' that I created a while ago, photocopied them (a few times) and then cut them up and stuck them down to create slightly different repeat patterns.
Then, using tracing paper, I have traced images to make them stand alone and to get a feeling for how they might look.
I am quite please with some of the results, which I think I might develop further as Thermofax screens.
Magic Stamp Blocks
1 May 2012
I tried something new at the textile class last night - printing with Magic Stamp blocks.
This stuff is pretty amazing. It allows you to mold and remold the block into an endless variety of textures and objects. (Well, the manufacturer says it is endless - presumably the stuff does eventually wear out. I don't know.)
To work this magic, we used a hot iron and a sheet of baking teflon (thanks Aldi!). You heat the block with the iron for about 30 seconds,using the teflon sheet to protect the iron, and then 'press' the hot block into your mold to get the image. I used printing blocks I had previously made using the craft foam (so that I got the negative image) but you can use all sorts of materials (dried lentils, pens, hessian, the list goes on and on)
These blocks are great as you can mold and remold them - the molded image will remain until you reheat the block.
Here is the first stamp I made with the original block cut from foam sheets next to it. (The leaves are black because I had used it to over print the stamped image - see the next photograph.)
I was just playing around, so this looks a bit messy, but I stamped with green first (4 times as the stamp block is quite small) and then over printed with the black ink
using the foam printing block.
This shows the stamp better ( the reverse of the original printing block). I did try to over print using pink ink. It did not work, but you can see the stamped pattern.
And then I tried the other side of the stamping block with another foam print block.
Here are the results with the stamp and the template below.
Neat stuff!
The block is a bit small (like a washing up sponge in size) but I can see real uses for it. And apparently you can get it in larger sheets which can be cut to size or used to make a larger print block.
Subscribe to:
Comments (Atom)


