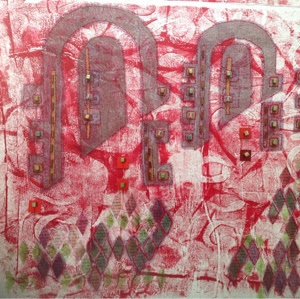
acrylic paints

Lasers and cycles - story of a commission
19 September 2018
It all began in January.

A lovely lady sent me an email asking if I ever did commissions. She explained that her partner, who had bought several of my pieces at last year's Hampshire Open Studios, really liked my work and had a 'big' birthday approaching and that she would like to commission a new work from me. Would I do a special piece for him?
Now this was a first for me, and in truth I did hesitate - but it was only for a moment. Yes, I said, of course. I would be delighted.
So she sent me the brief.
- His favourite colours were yellow and blue
- He loves sailing his laser dinghy
- He loves riding his bike - the Colnago C60
Could I work with that?
Yes, I said, I could - and then the muse left me!
I don't know if it was the pressure or the colours and subject matter ( well out of my comfort zone) but I found it a real struggle to envisage this piece.
But then, on holiday in Denmark, I saw a laser dinghy in the sea just near 'that Bridge', and it all began to come together.


Meanwhile I auditioned background papers.


At this point a new idea struck. I would use the shape of the silhouette of the laser. So I cut out a few shapes. Some were from painted papers and some from an A-Z of Gosport, the home of the customer.

I rummaged through the painted papers stash.
These looked promising.


Placing and experimenting.


Meanwhile, more experimentation and beginning to incorporate a few place names. ('The Solent' for example).

And a brainwave with the bike! Tiny ribbons of coloured tissue. You have to look really hard, it doesn't detract from the design but I think it really works, tucked in there.


Stitched! (below).
It is fully stitched but I used a variegated thread, blue running to yellow. I stitched around the boat profiles but I did stitch over the three background blocks to tie them in.

And then added some additional blue hand colouring .

Free motion stitched ribbon using organza and dissolvable film. I'm introducing another colour here, a little bit of pink, so again this was not a rushed decision but one that needed to be carefully considered.


One happy customer and one very happy recipient.
Really pleased with this. It was a tough one but when I got going it came together really well.

Painting with Acrylics
17 March 2018
I might have discovered a new passion - acrylic paints.


Once the background was covered it was then a case of adding pattern.

I used stencils, the side of an old credit card to print simple lines, the end of a paint brush to also dab simply shapes and scrafito (scraping off paint with the end of a small paint brush to reveal the paint underneath)

I gradually built up the layers, until I was satisfied. On this first outing I ended up with two finished papers. I produced them simultaneously (the same paints etc.) but just varied the backgrounds slightly.


Now, I am not new to Acrylic paint. In fact, I use acrylics a lot. From time to time I have written about them here on the blog. For instance, I am a bit of a fan of Paper Artsy Fresco Finish paints.

I use them for monoprinting (not for the faint hearted if, like me, you print with tissue paper! They dry quickly, one of their key features, which means if you don't move quickly the paint simply bonds the tissue to the printing plate) and for decorating background papers which I use for collage.

I also print with hand made print blocks using acrylics.


But I have never actually tried to just use acrylic paints to build up layers on their own.
I was inspired by a video from Laura and Linda Kemshall on DMTV. Laura demonstrated a hand painting using a background painted with Acrylics.
I was having one of those days when I just needed to find something really absorbing to do. What with the day job being very full on plus having to clear my late mums house, things have been hard work of late.
I just needed something really therapeutic.
The process is extremely satisfying. I started by building up blocks of colour. As you can see, some of the paints mixed on the paper. While you don't want everything to turn into a muddy brown, you also don't need to be too precious.


Once the background was covered it was then a case of adding pattern.

I used stencils, the side of an old credit card to print simple lines, the end of a paint brush to also dab simply shapes and scrafito (scraping off paint with the end of a small paint brush to reveal the paint underneath)

I gradually built up the layers, until I was satisfied. On this first outing I ended up with two finished papers. I produced them simultaneously (the same paints etc.) but just varied the backgrounds slightly.


I just love these. The big question is what next. I have ideas brewing. I am wondering about printing these onto velvet. I think they might make spectacular cushions. What do you think?
Subscribe to:
Posts (Atom)