I did it! It is done, complete and in the post - winging its way to it's new owner.

Here is the beaded spine - a mix of hand made and bought beads.

And a bit of a flip through of the pages.


The back of that 'Rules' tag says None, by the way!


Oh - and this is the inside back cover with a few artist materials ready to go (I also added a few gel pens too)

Will she like it? I don't know!
Will she even 'get it' - I don't know that either. Daughter No 1 says "Its a journal - of course she'll get it!"
Well, I promised you a tutorial of sorts, so get a cuppa on the go and settle down, for here is how I did it!
First up a good bit of strong recycled cardboard - an old Boneo box was perfect!

I cut off the various flaps but stuck them to the inside to give it more strengh (using double sided tape and PVA)
The spine is a cracker packet - all four sides are used (2 x 2 for strength and laid side by side - again stuck to the Boneo box with PVA and double sided tape. I did a bit of measuring here to get it even)


Next, brown paper to give a more even surface and hid the bumps. PVAd onto the box.


OK - so now it's looking promising.
Next up - a bit of calico, backed onto Bondaweb, cut into squares and then stuck down.
I confess, I got the idea for this from Lin Brown's rather fab blog here. (Tell her I sent you over for a peek when you pop by!)


Promising, but still more to do.
At this point I gave the whole thing a coat of white acrylic paint. I used a heavy body acrylic from Daler Rowney, simply because I had it and it has excellent opacity. I knew that if I did not tie the background together in some way it would be hard work later. I am glad I did. I could have used Gesso, but I did not want that sandy, texture finish.
So now my new toys are going to be pressed into service. (If you are interested, contact info is at the bottom of this post)

And just look at the mess I had created along the way!

But first, I needed to make a stencil. More recycling - this time with an old acetate folder cover. Easy to cut though a bit flimsy if I am honest. Still it did the job.

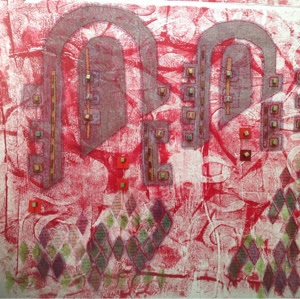
Test page in my sketch book.

And now for the cover! With a palette knife I applied a bit of the Grunge Paste from PaperArtsy. (you can see how the white paint just knocked everything together here. You can also see how far from a Boneo box this is now travelling!)

And now to paint!
I was very smitten with the colours that Lin had used in her piece so I treated myself to some really with this project in mind. I am always drawn to warm, earthy colours.
I used Chartreuse and Tikka blended together and tied down with Chutney around the edges.
Then I used some 'Treasure Gold' - this is not really a paint, but gold pigment suspended in a very smelly fluid a bit like white spirit. You don't need much at all. Just a few gentle strokes to bring out the texture of the raised leaves.
Next some old chocolate wrappers for added interest.


Then I turned my attention to the inside of the covers.
Since this thing was to have a pocket at the back the inside had to have a bit of oomph - step forward the pelmet vilene.
Painted in the same was as the front.


Now here you have to start planning your pockets.
For the back I used some previously marbled fabric and made a double layer pocket, as you can see here. The peg is helping the PVA make a good firm bond.
i also had to think about the closure at this point. I decided on elastic. If I am honest, this is the one bit of the project I would change in future.
As you can see from the picture I had three separate pieces for the inside covers - front , back and middle. That was definitely a wise move with the movement on opening and closing.
The red thread is the button on the front to hold the elastic (in face 2 buttons and a bead in a little stack). Again, in future I think I would change this and make a home made button that tied in better to the design.
I did make, but then rejected this beauty. For another project I think.


And the inside finished - the little pockets on the inside front cover are marbled and stamped tyvek from my stash.

The book at this stage. A full days work and now just the folios to go.


The cards have enough strength to give the individual folios structure to hold together in a loose binding. The other pages were made with rag paper (tear it to give it lovely soft edges if you ever use it) and some other random art papers I had. Some I painted and even printed, but some I left white.
So they were painted and stamped and in some cases embellished with painted tags or more previously decorated fabrics.


So another hand made stamp. (I love making hand made stamps!)


So now just assembly.
But first, let's audition some beads (I love that word!)
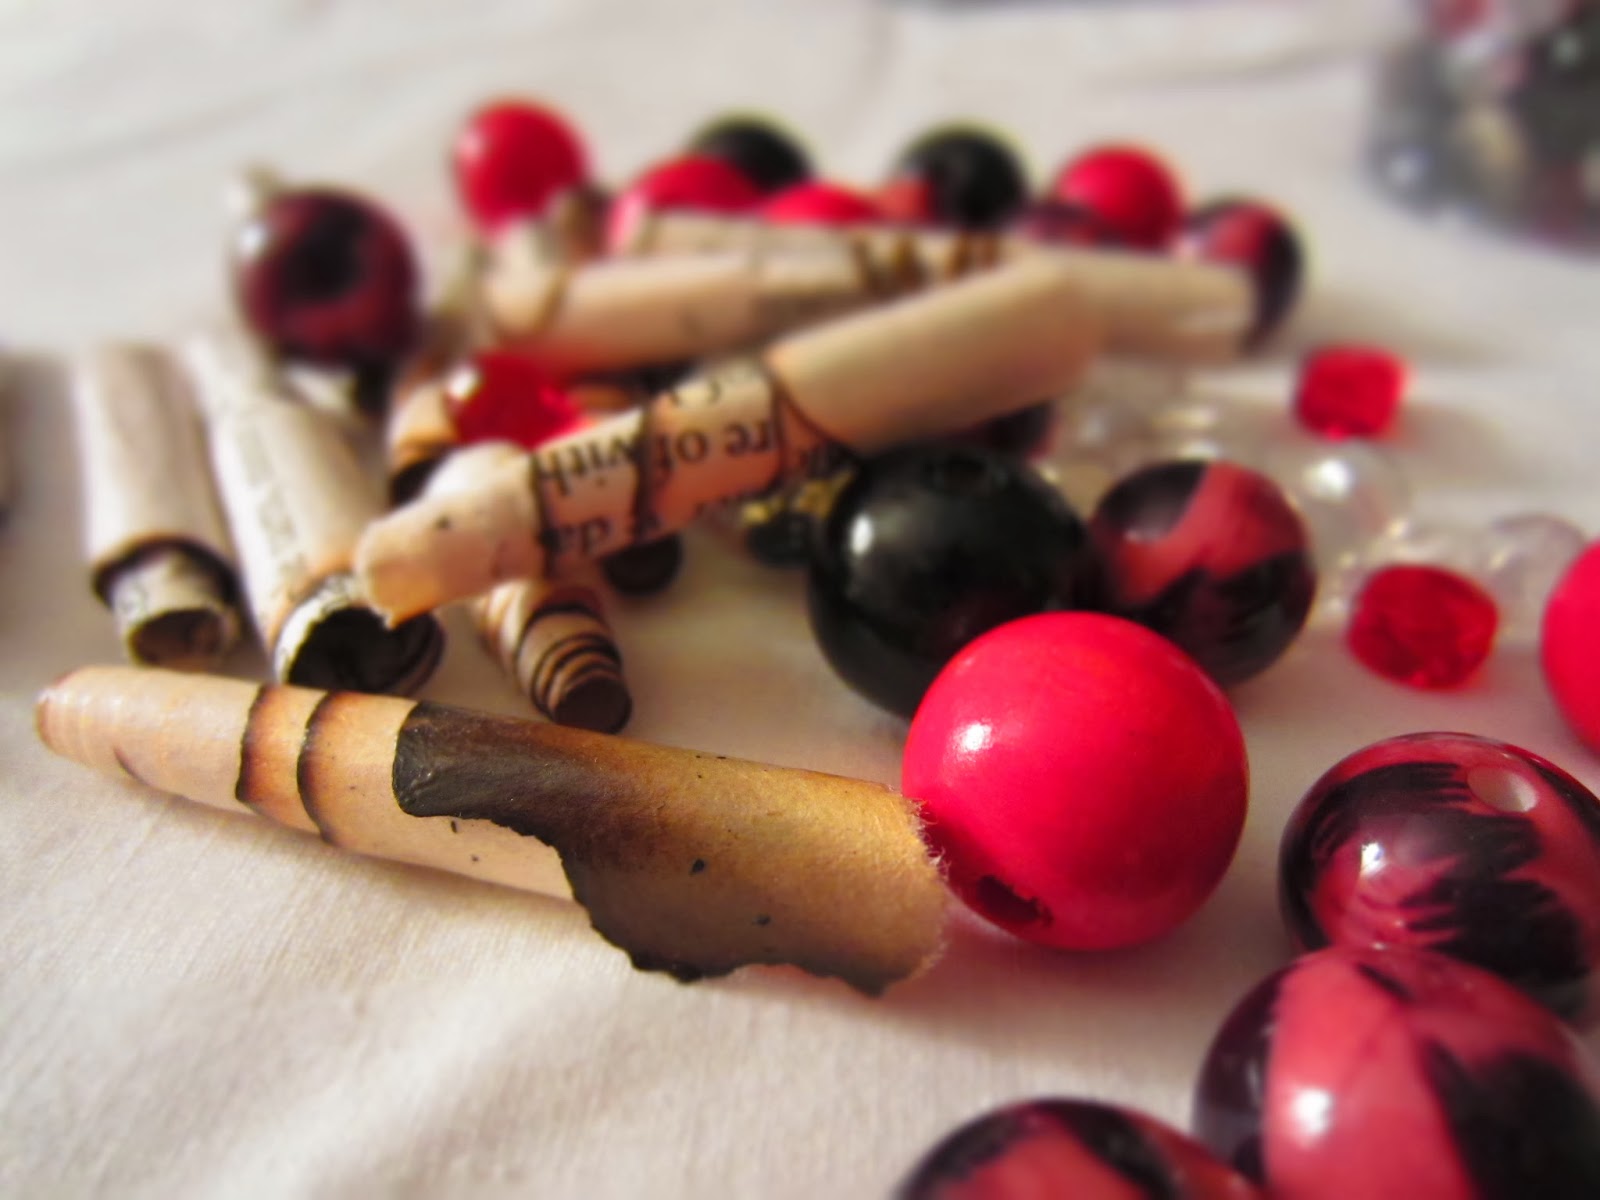
A mix of handmade (from a torn book with burnt edges - lovely effect but a tad risky! These were the result of another day playing at just making stuff following inspiration from this blog and video channel)

So here is a flip through of the finished article.
A couple of decorated tags at the beginning to make it personal.


A few tags in pockets are hidden in the book. For no particular reason.

The spine!


Tag with a tea pot - Fee loves Tea Pots!


Loving my crab stamp. He'll be used again for sure.


And there you have it.
I am really please with the outcome of this book, and I love the effect of the new paints and the Grunge Paste.
This was a very hefty project - hence the blogging silence (blog or create? Well - duh - create!!)
I now need to go and recover - oh and plan the next project.
Seriously, let me know what you think. I really loved making this and already have another in mind.


Absolutely fabulous! What a lot of work - both the journal and the blogging! - but thanks for sharing. I especially like the label that said Rules (none on the back)!
ReplyDeleteThanks Annabel - your comments mean a lot to me cos you are officially now in my hall of fame! And I can bask in the glory of knowing you read my blog!!
DeleteSeriously, loved this. Loved the mixed media, the mess and the paint. Was quite the little piggy in the poo!
Wow, the recipient is very lucky to get this. So many ideas here to feast on from afar, I would be over the moon to receive this.
ReplyDeleteWell, thank you so very much.
DeleteFabulous!
ReplyDeleteI love it!
Thanks Gill. I really enjoyed making it.
DeleteSo interesting! I will peruse at my leisure - don't have much of that right now - but can see lots of really useful hints. Next week I have to make a book cover and will read with that cuppa before I start!
ReplyDeleteGive me a shout if anything isn't clear and I will try to explain in clearer language.
DeleteOh my, what a lot of work. Thank you so much for the information and for the fabulous pictures. I hope you stopped for a cuppa when you were all done!! I'm going back to have another read!! Thanks again.
ReplyDeleteThanks Marny - I had several!!
DeleteOne thing I have just realised, I forgot to tell everyone about the fact that when finished, I gave the cover a good covering with Matt medium to make it robust.
I'm glad you admitted you didn't throw this together in an afternoon. ;-) Totally fascinated with the steps in making the covers and the inside pages are just so much fun. This sort of thing is so special for the recipient as you took the time and effort to personalize it with things special to her. And so much recycling...Well done!
ReplyDeleteThanks Sheila. I loved making this I must admit.
DeleteTotally awesome project Hilary, the recipient of this gorgeous book will be blown away.
ReplyDeleteLin
Thanks Lin - and no small thanks to your good self. I love your paint colours and I loved building up layers on the cover.
DeleteFascinating, and a wonderful result. Must fwd to my friend Jackie who will love this!
ReplyDeleteI think books could become addictive. Is Jackie into hand made art books? I'm already planning more.
DeleteWow! What an amazing blog and amazing book! Thanks so much for sharing it all.
ReplyDeleteThanks very much. I did enjoy making it.
DeleteWoah, that's some project! Amazing! Especially like the beaded spine.
ReplyDeleteThanks Iz. I looks the spine, but would have liked it more if more of the beads had been hand made. Going to get down to making some more.
ReplyDeleteWow - what a marathon! Some fantastic ideas and effects - I'm sure the recipient was delighted with the result!
ReplyDelete