(A bit of background: the Contemporary Quilt Group of the Quilters Guild organises an annual JQ challenge. If you accept the challenge you commit to producing a JQ a month for a year. This year, my first as a Guild Member and so my first year of the Challenger, I committed to producing 12 little quilts on the theme of Memories. You can follow my JQ journey here if you are interested)
So, while Horizons festers in the corner (I am so frustrated by my lack of technical planning) I cracked on with the next two little quilts that have to be completed by the end of April).
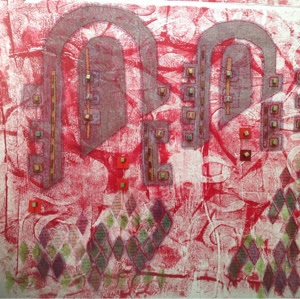
I already had the background made - at the beginning of the process I did a larger piece which I have cut up.

Tissue paper 'laminated' onto fabric with a PV/water mix.

Brusho inks sprinkled onto the wet tissue.

Spread around with an old credit card.

You will see from my last post that I decided on a theme of bedtime stories and produced this little sketch using Inktense and water colour pencils. (If you are wondering, I did enhance the colour slightly in 'Paint' after I had scanned the original as I know that when printing onto fabric the colour will look a bit washed out.)

But when I left you I had created another dilemma - how to print it out!
Two options - Evolon and Lutrador (lightweight). I knew that both would go through my printer. As it turned out the image was lost on the lutrador as I suspected - it was too lacy and most of the ink ended up on the carried paper. So the Evolon it was.

The rest was simple.

I will show you the finished quilt with the binding attached in the next post, but I hope you like this for now.


This loos very intricate. You must she a very steady hand with your soldering iron,
ReplyDeleteI think I must be, though I hadn't really thought about it before. Great way to 'trim' the fabric!
DeleteCute, I was waiting for this weeks update :) x
ReplyDeleteBut you'll notice that the bloomin Horizons dilemma is still not sorted out.
DeleteWhat a palava!
Could it be a horizon through a bedroom window in the aperture? just a thought....is that allowed? too literal? x
Deleteha ha - I hadn't thought of that! lol.
DeleteAmazing work!
ReplyDeleteWell thank you. And I can say the same for you painting and decorating and general 'new home making'!
DeleteGorgeous colours - and so intricate!
ReplyDeleteThanks. Great fun to do. Next time I would actually be even bolder with the colours. But the effect is good. Did you see the finished piece on the gallery page?
DeleteJust had a peek. Have to say your bunny looks a bit malevolent! ;-)
Deleteha ha - you're right! He clearly is a bit miffed about something, and the sheep looks very vacant!
Delete